Screenshot-Driven Development
I'm a developer at heart, so when I'm working on a personal project, the hardest part isn't writing code—it's making design decisions. I recently built a calendar user interface. I wanted to enhance its visual appeal, so I researched UI design trends like "glassmorphism" and "claymorphism."
However, I didn't want to spend hours implementing the CSS for each design trend, so I developed a faster approach: screenshot-driven development. I used an open source developer agent called Goose to transform my user interfaces quickly.
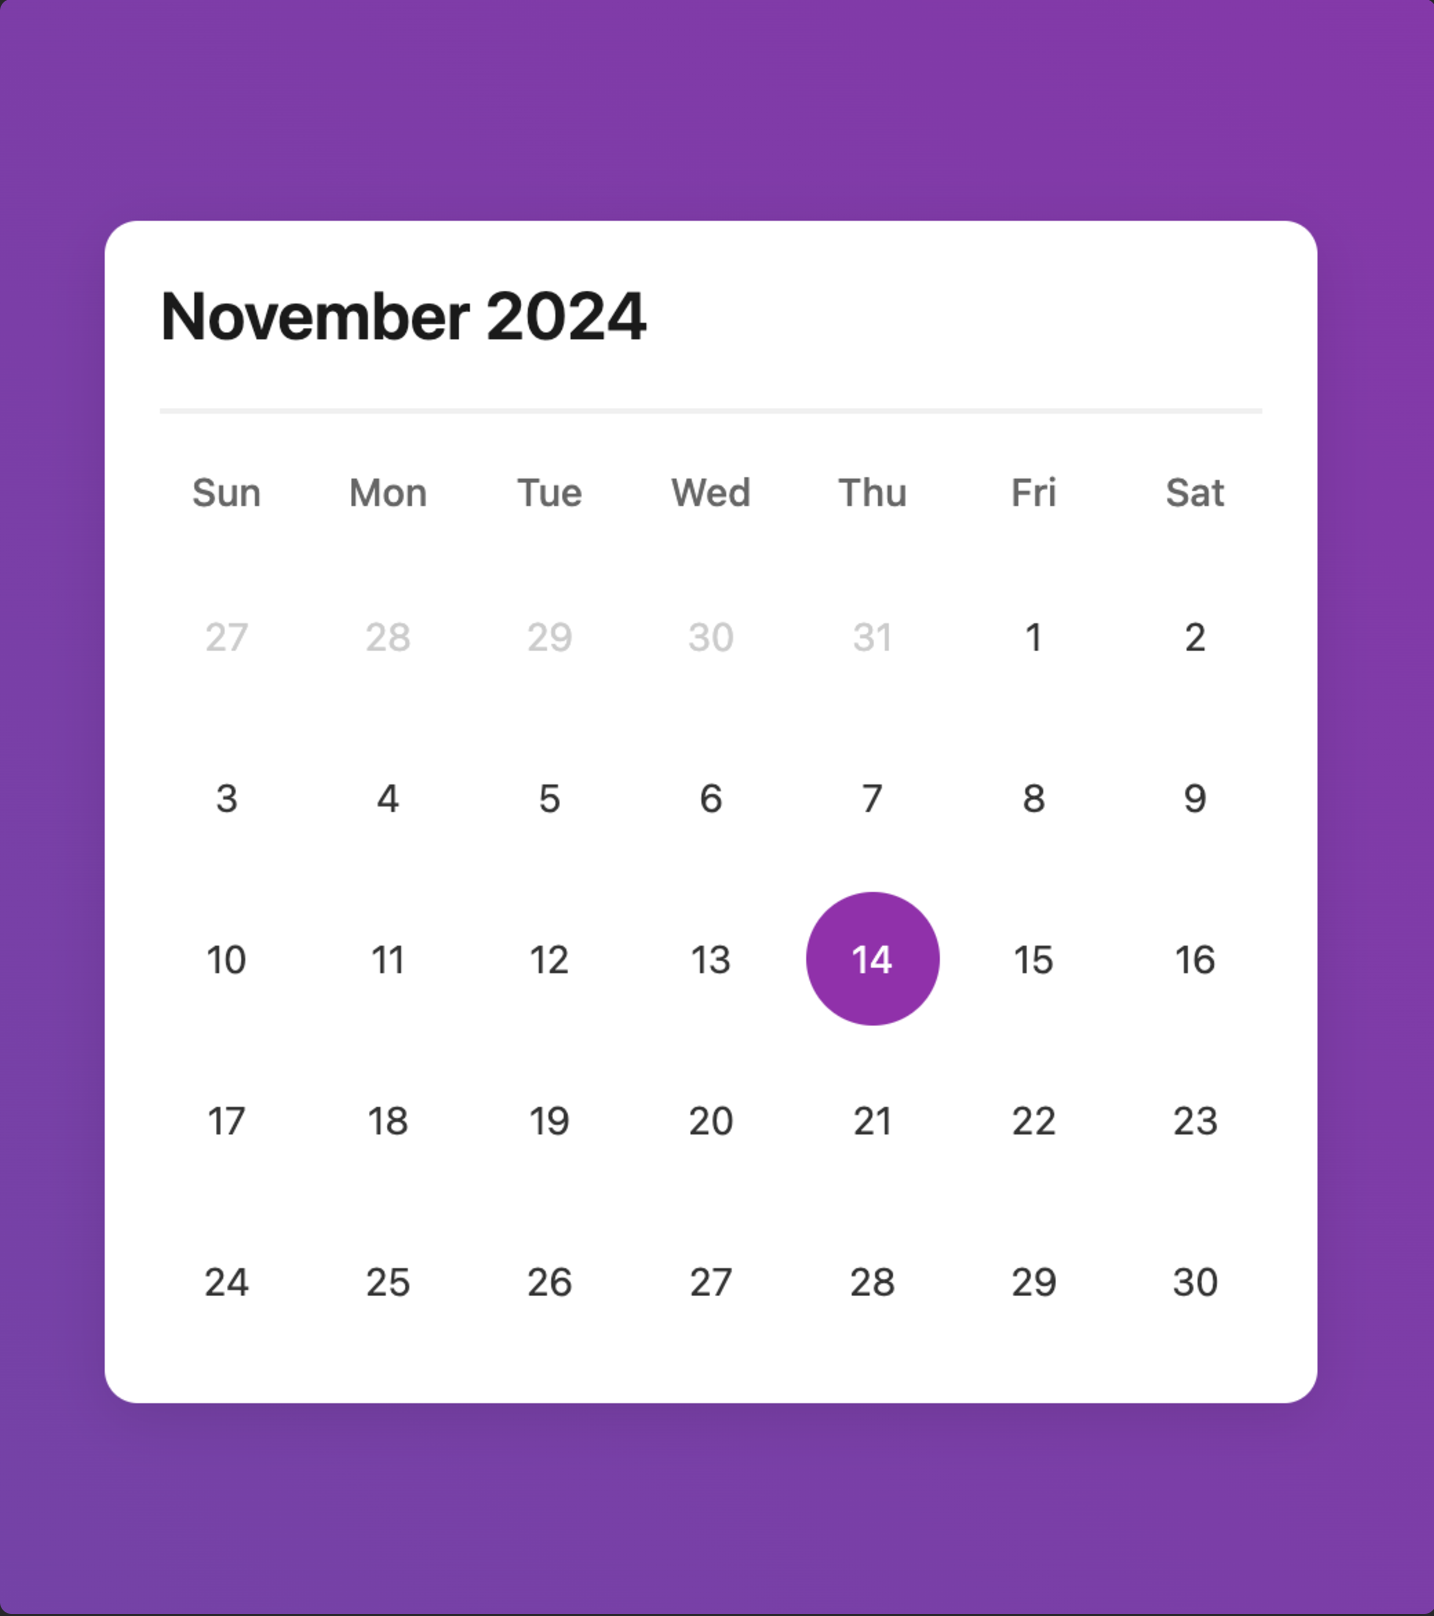
My original calendar:
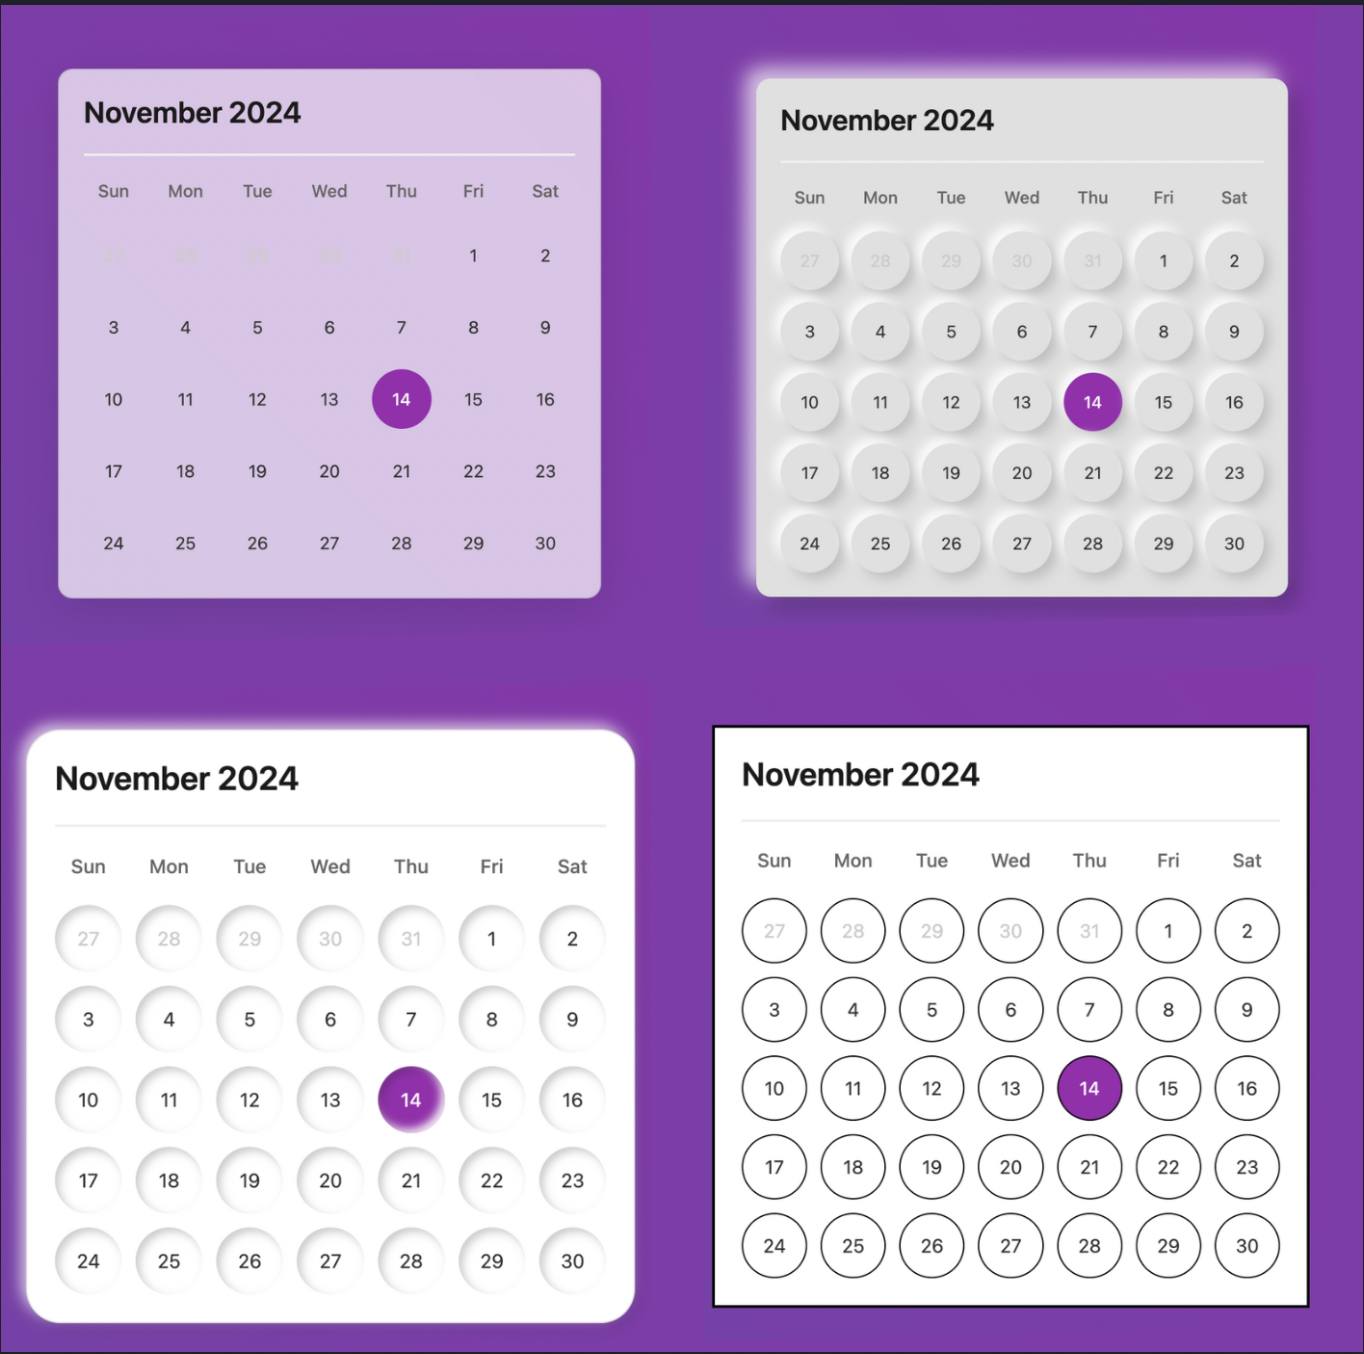
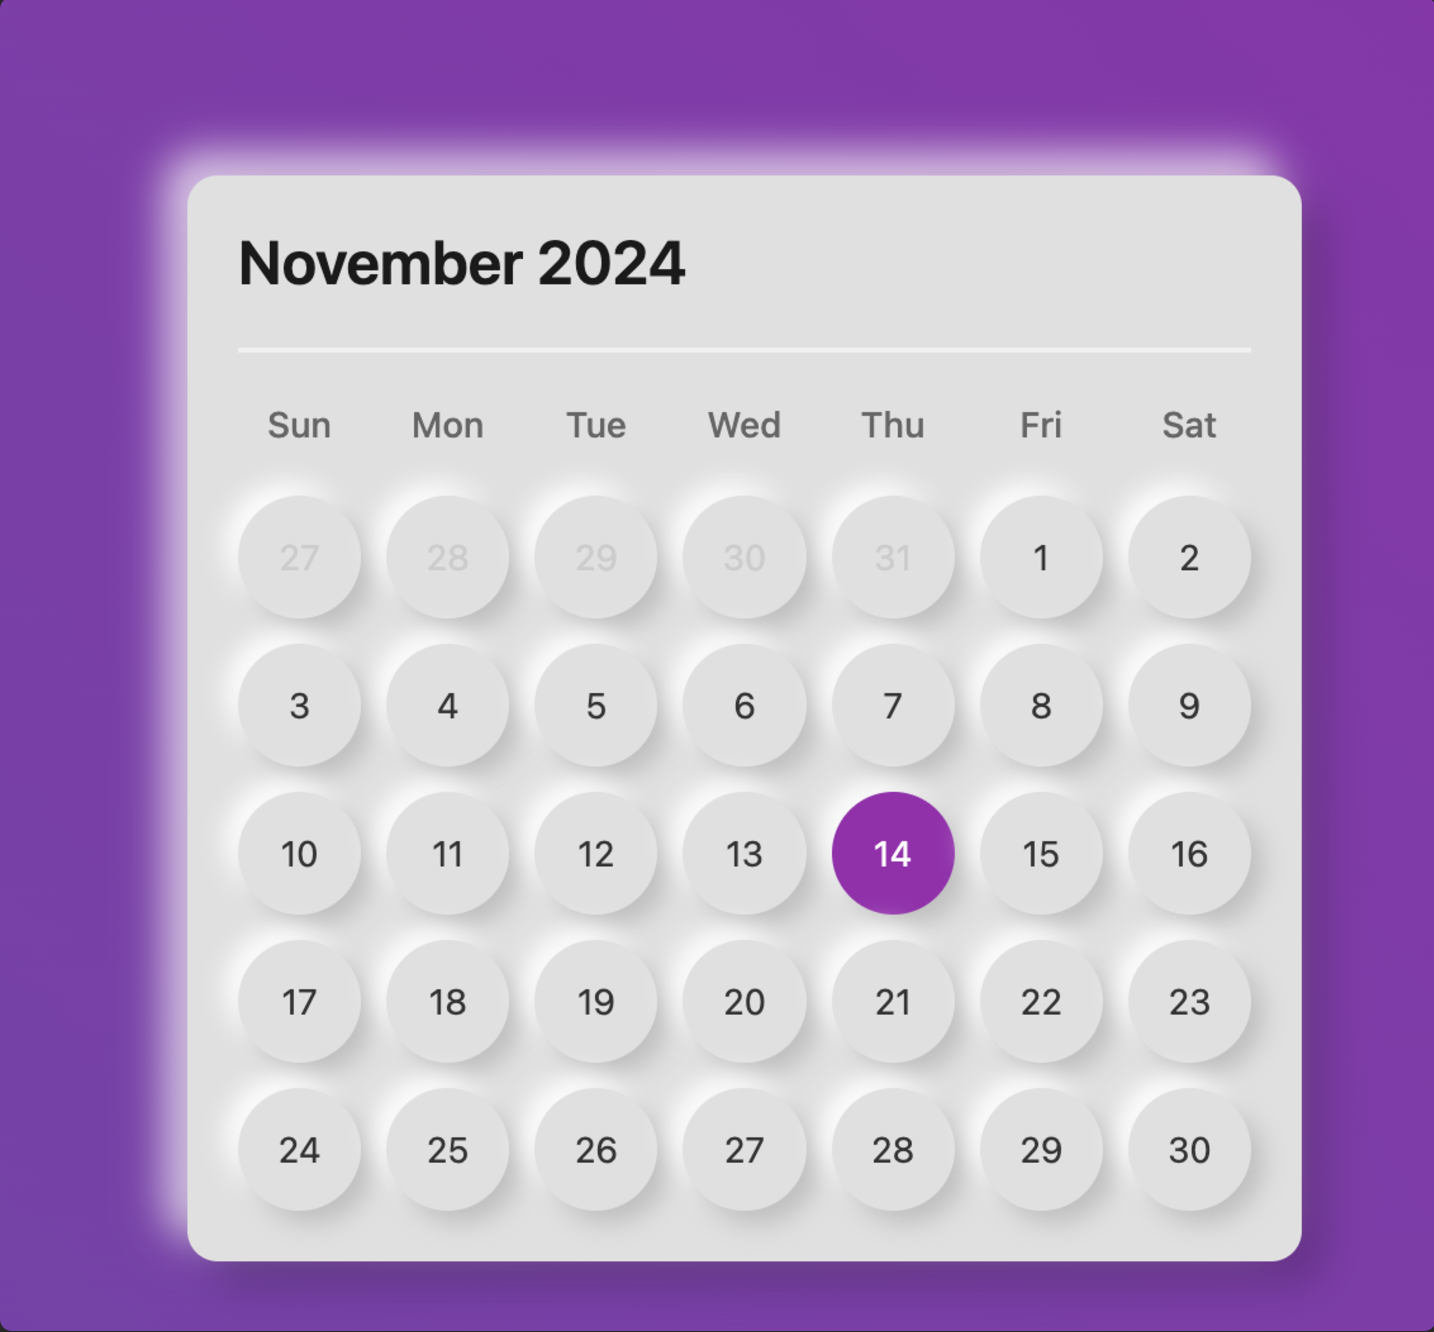
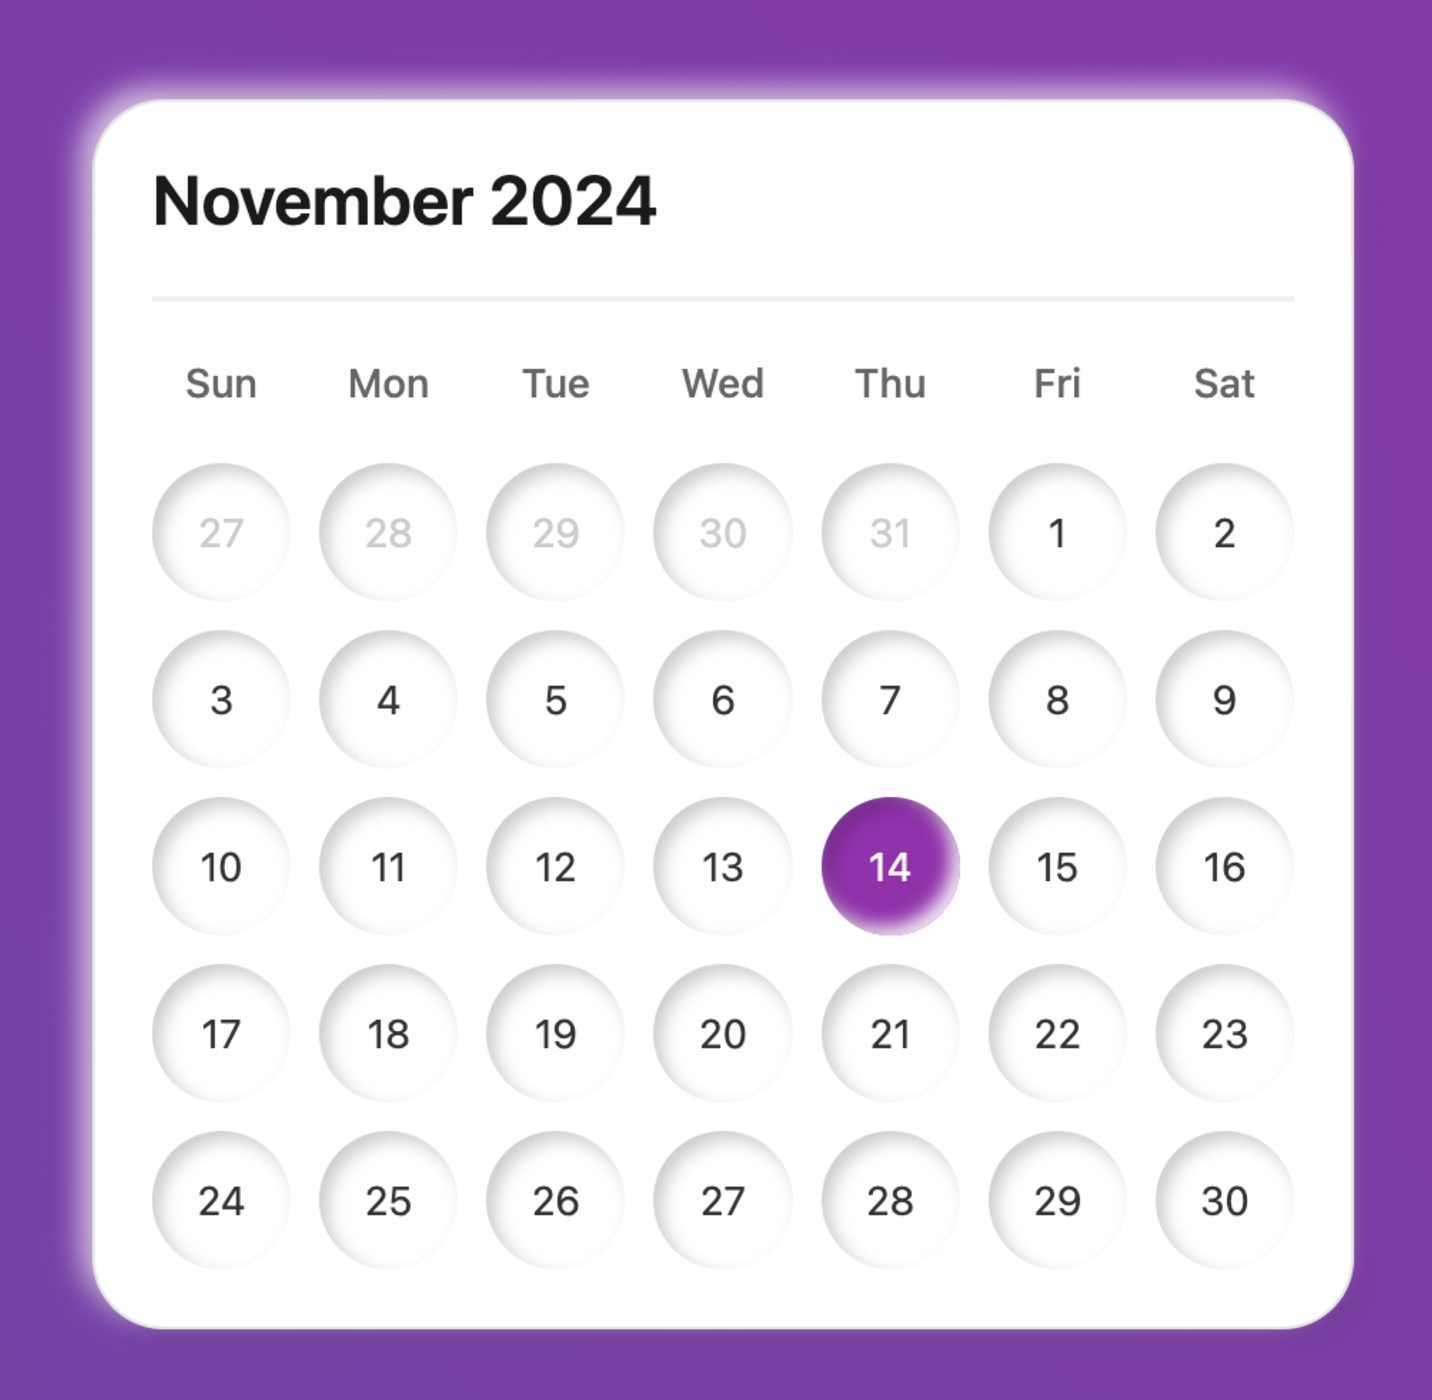
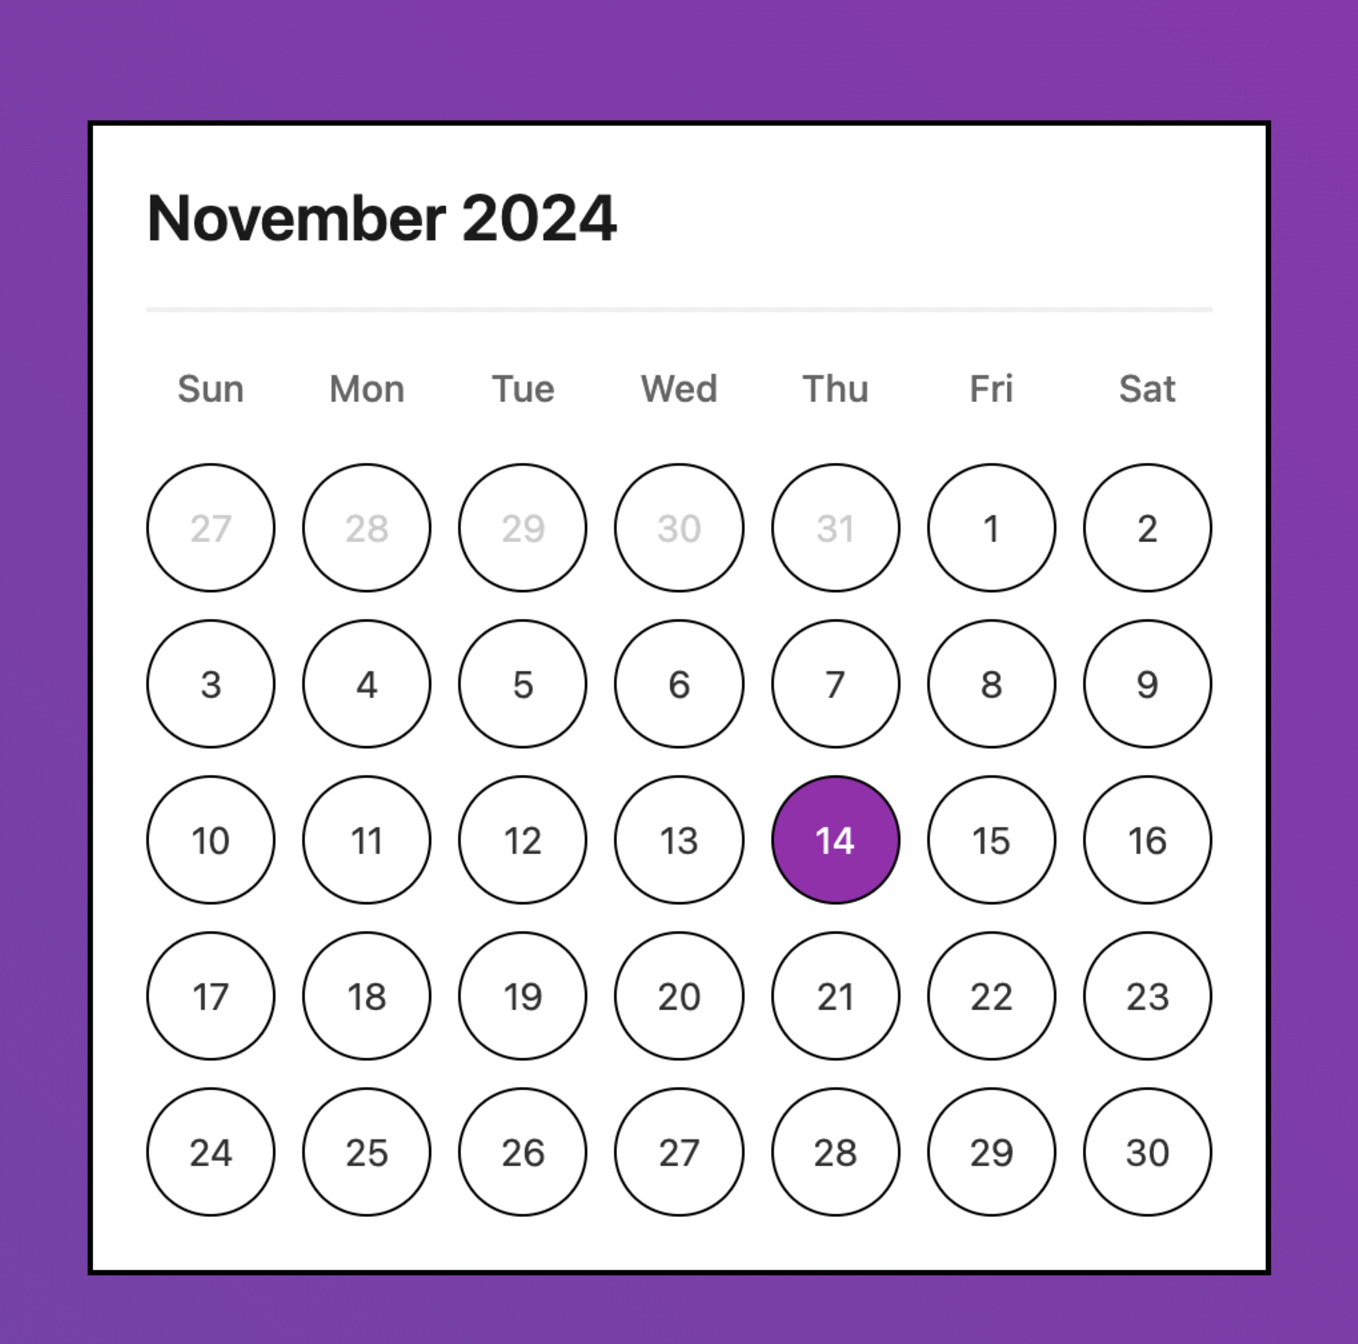
Goose prototyped the designs below:
In this blog post, I'll show you how to quickly prototype design styles by letting Goose handle the CSS for you.
💡 Note: Your results might look different from my examples - that's part of the fun of generative AI! Each run can produce unique variations of these design trends.
Get Started with Screenshot-Driven Development
Step 1: Create your UI
Let's create a basic UI to experiment with. Create an index.html file with the code below:
Create an index.html file with the code below
<!DOCTYPE html>
<html>
<head>
    <style>
        body {
            display: flex;
            justify-content: center;
            align-items: center;
            min-height: 100vh;
            margin: 0;
            background: linear-gradient(45deg, #6e48aa, #9c27b0);
            font-family: -apple-system, BlinkMacSystemFont, "Segoe UI", Roboto, sans-serif;
        }

        .calendar {
            background: white;
            border-radius: 12px;
            box-shadow: 0 5px 20px rgba(0,0,0,0.1);
            width: 400px;
            padding: 20px;
        }

        .header {
            display: flex;
            justify-content: space-between;
            align-items: center;
            padding-bottom: 20px;
            border-bottom: 2px solid #f0f0f0;
        }

        .month {
            font-size: 24px;
            font-weight: 600;
            color: #1a1a1a;
        }

        .days {
            display: grid;
            grid-template-columns: repeat(7, 1fr);
            gap: 10px;
            margin-top: 20px;
            text-align: center;
        }

        .days-header {
            display: grid;
            grid-template-columns: repeat(7, 1fr);
            gap: 10px;
            margin-top: 20px;
            text-align: center;
        }

        .days-header span {
            color: #666;
            font-weight: 500;
            font-size: 14px;
        }

        .day {
            aspect-ratio: 1;
            display: flex;
            align-items: center;
            justify-content: center;
            border-radius: 50%;
            font-size: 14px;
            color: #333;
            cursor: pointer;
            transition: all 0.2s;
        }

        .day:hover {
            background: #f0f0f0;
        }

        .day.today {
            background: #9c27b0;
            color: white;
        }

        .day.inactive {
            color: #ccc;
        }
    </style>
</head>
<body>
    <div class="calendar">
        <div class="header">
            <div class="month">November 2024</div>
        </div>
        <div class="days-header">
            <span>Sun</span>
            <span>Mon</span>
            <span>Tue</span>
            <span>Wed</span>
            <span>Thu</span>
            <span>Fri</span>
            <span>Sat</span>
        </div>
        <div class="days">
            <div class="day inactive">27</div>
            <div class="day inactive">28</div>
            <div class="day inactive">29</div>
            <div class="day inactive">30</div>
            <div class="day inactive">31</div>
            <div class="day">1</div>
            <div class="day">2</div>
            <div class="day">3</div>
            <div class="day">4</div>
            <div class="day">5</div>
            <div class="day">6</div>
            <div class="day">7</div>
            <div class="day">8</div>
            <div class="day">9</div>
            <div class="day">10</div>
            <div class="day">11</div>
            <div class="day">12</div>
            <div class="day">13</div>
            <div class="day today">14</div>
            <div class="day">15</div>
            <div class="day">16</div>
            <div class="day">17</div>
            <div class="day">18</div>
            <div class="day">19</div>
            <div class="day">20</div>
            <div class="day">21</div>
            <div class="day">22</div>
            <div class="day">23</div>
            <div class="day">24</div>
            <div class="day">25</div>
            <div class="day">26</div>
            <div class="day">27</div>
            <div class="day">28</div>
            <div class="day">29</div>
            <div class="day">30</div>
        </div>
    </div>
</body>
</html>
Once saved, open the file in your browser. You should see a calendar!
Step 2: Install Goose
Step 3: Start a session
Bring your own LLM
Goose will prompt you to set up your API key when you first run this command. You can use various LLM providers like OpenAI or Anthropic
Step 4: Enable the Screen toolkit
Goose uses toolkits to extend its capabilities. The screen toolkit lets Goose take and analyze screenshots.
To enable the Screen toolkit, add it to your Goose profile at ~/.config/goose/profiles.yaml.
Your configuration might look slightly different depending on your LLM provider preferences.
default:
  provider: openai
  processor: gpt-4o
  accelerator: gpt-4o-mini
  moderator: truncate
  toolkits:
  - name: developer
    requires: {}
  - name: screen
    requires: {}
Step 5: Prompt Goose to screenshot your UI
Goose analyzes your UI through screenshots to understand its structure and elements. In your Gooses session, prompt Goose to take a screenshot by specifying which display your UI is on:
The display number is required - use display(1) for your main monitor or display(2) for a secondary monitor.
Upon success, Goose will run a screencapture command and save it as a temporary file.
Step 6: Prompt Goose to transform your UI
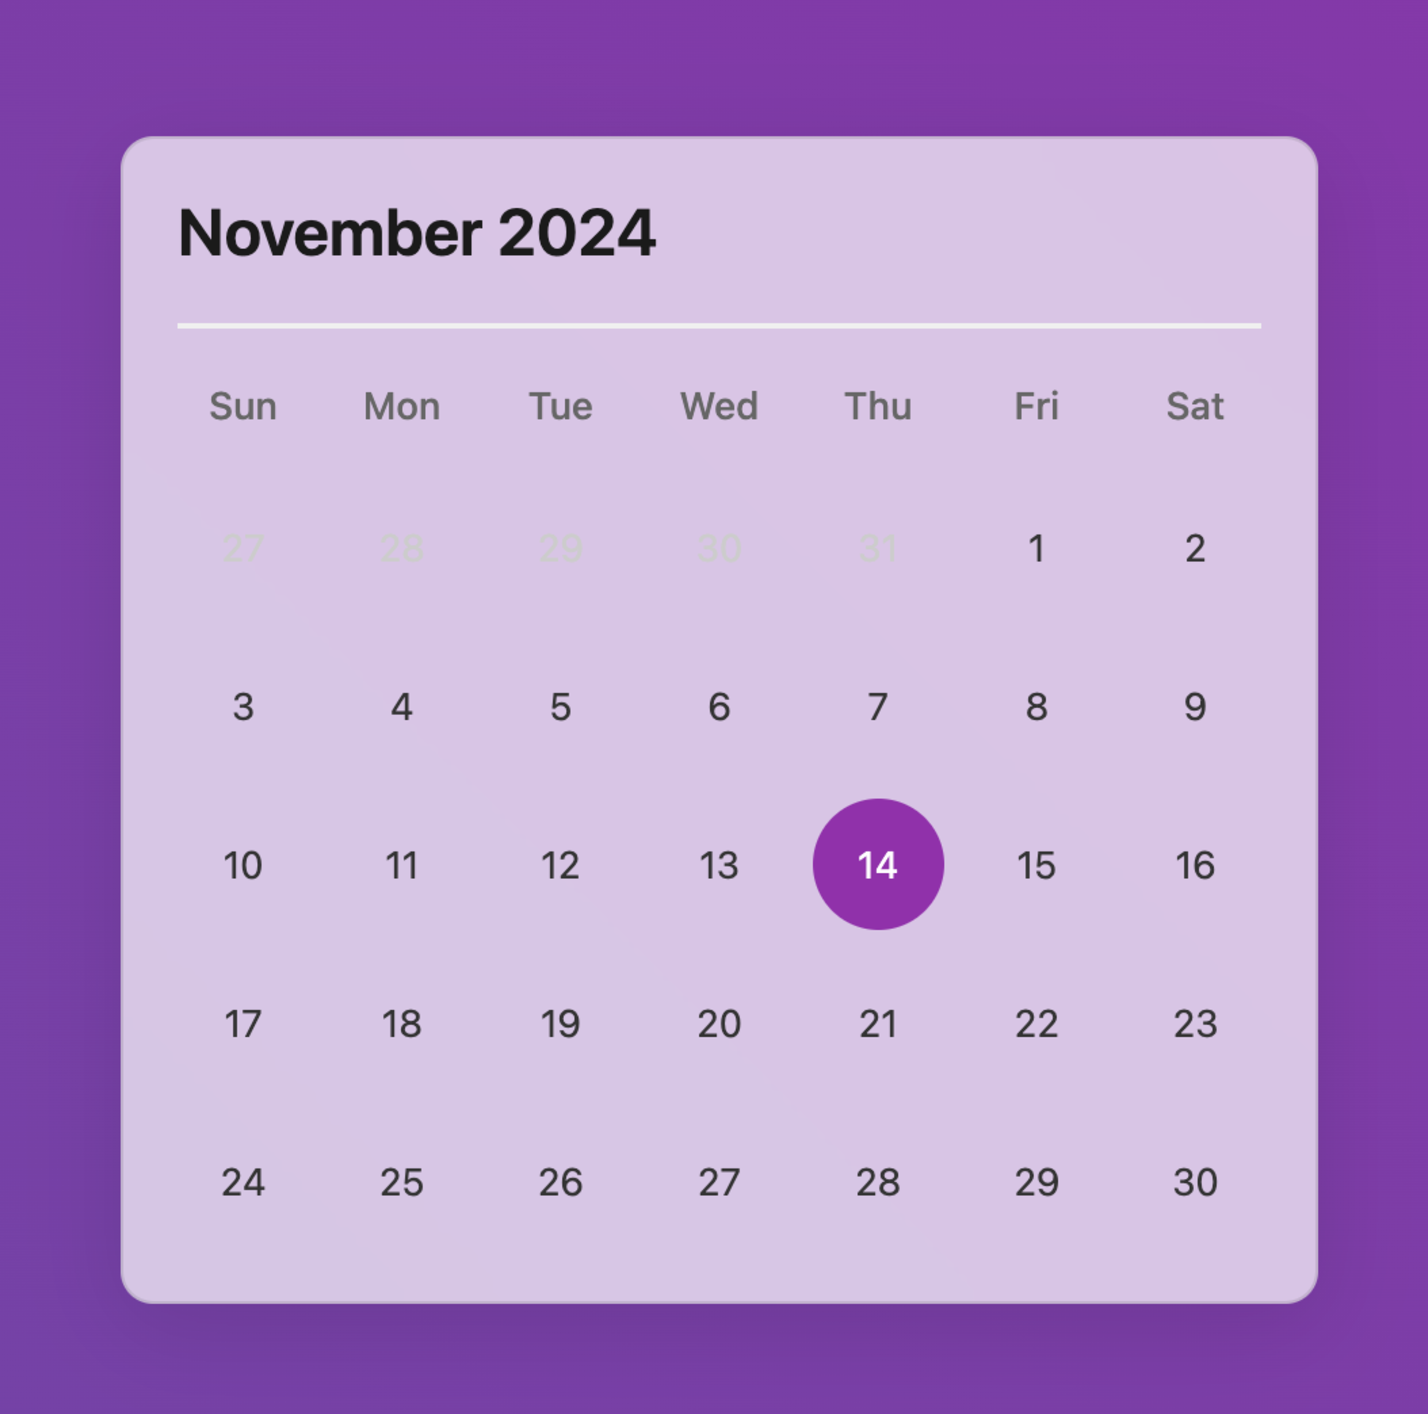
Now, you can ask Goose to apply different design styles. Here are some of the prompts I gave Goose and the results it produced:
Glassmorphism
Neumorphism
Claymorphism
Brutalism
Learn More
Developing user interfaces is a blend of creativity and problem-solving. And I love that using Goose gives me more time to focus on creativity rather than wrestling with CSS for hours.
Beyond prototyping, Goose's ability to analyze screenshots can help developers identify and resolve UI bugs.
If you're interested in learning more, check out the Goose repo and join our Discord community.
