How to Make An MCP Server MCP-UI Compatible

MCP-UI is in its infancy, and there's something addictive about being this early to the party. We're at this fascinating point where both the spec and client implementations are actively developing, and I find it thrilling to build alongside that evolution.
I wanted to see how far I could push it. So I grabbed two open source MCP servers, Cloudinary and Filesystem, and gave them a UI. Instead of boring text, I now get rich, interactive interfaces right inside goose.
Why I Wanted This
Raw JSON and text is fine, it gets the job done but let's be real I'd rather interact with something pretty. Give me a cool UI over back and forth prompts.
Take Cloudinary for example. By default, uploads return a block of text, basically a JSON dump of URLs, metadata, and public IDs. Useful, sure, but not exactly easy to glance at.
What I really wanted was:
- Image and video previews
- One‑click buttons to copy or view links
- Transformation examples
With MCP-UI, it’s not just text responses anymore. Now responses can be little apps you can actually click around in within your agent's chat interface.
The Pattern
Here’s the cool part, the steps are basically the same for any MCP server.
1. Install the SDK
npm install @mcp-ui/server
2. Import it
import { createUIResource } from "@mcp-ui/server";
3. Build your HTML
For my Cloudinary server update, I used Direct HTML → iframe. I wrote a function that returns an HTML string that includes upload previews and action buttons.
MCP-UI takes that HTML and renders it inside an iframe using srcdoc.
It’s simple, totally self-contained, fast to iterate, and I get full control over how it looks.
💡 However, other modes exist:
-
External URL – iframe a hosted page:
content: { type: "externalUrl", iframeUrl } -
Remote DOM – send a script that builds UI directly in the host’s DOM:
content: { type: "remoteDom", script, framework }
But for my use case, Direct HTML was the perfect fit.
4. Return both
In your tool handler, I recommend returning both the original response and the createUIResource.
That’s it. Regardless the server the main steps remain the same.
Right now the MCP-UI SDK is only available in TypeScript and Ruby. If your server is in one of those languages, you can start today. If not, you’ll either need to wait for more SDKs to drop or build your own bindings.
Step 3: My Cloudinary UI
Here’s the HTML generator I wrote for Cloudinary, this is where you decide exactly how your UI should look.
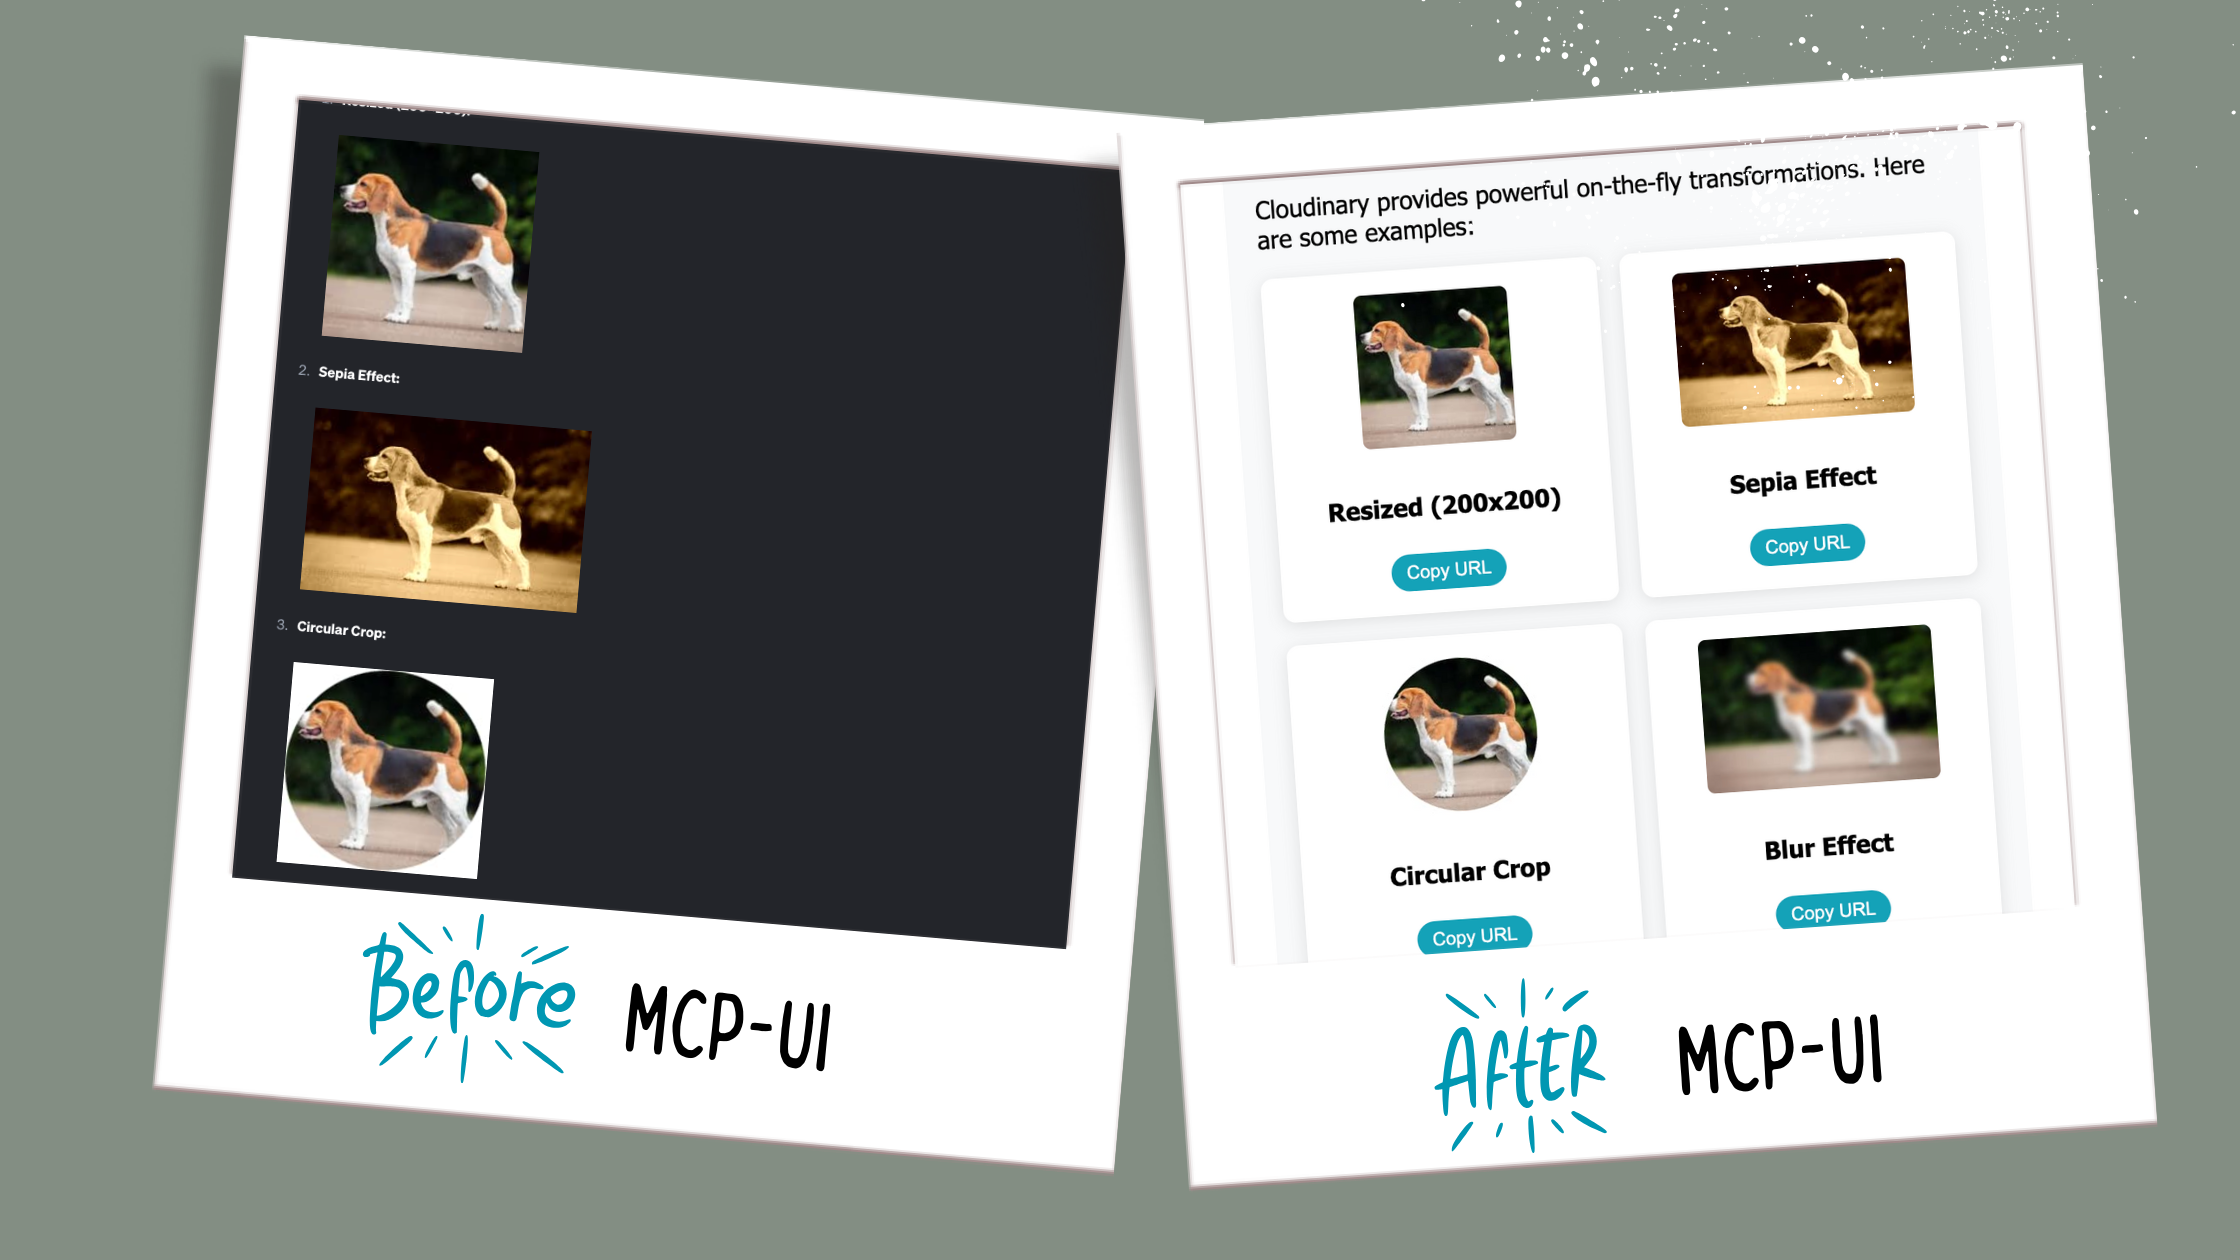
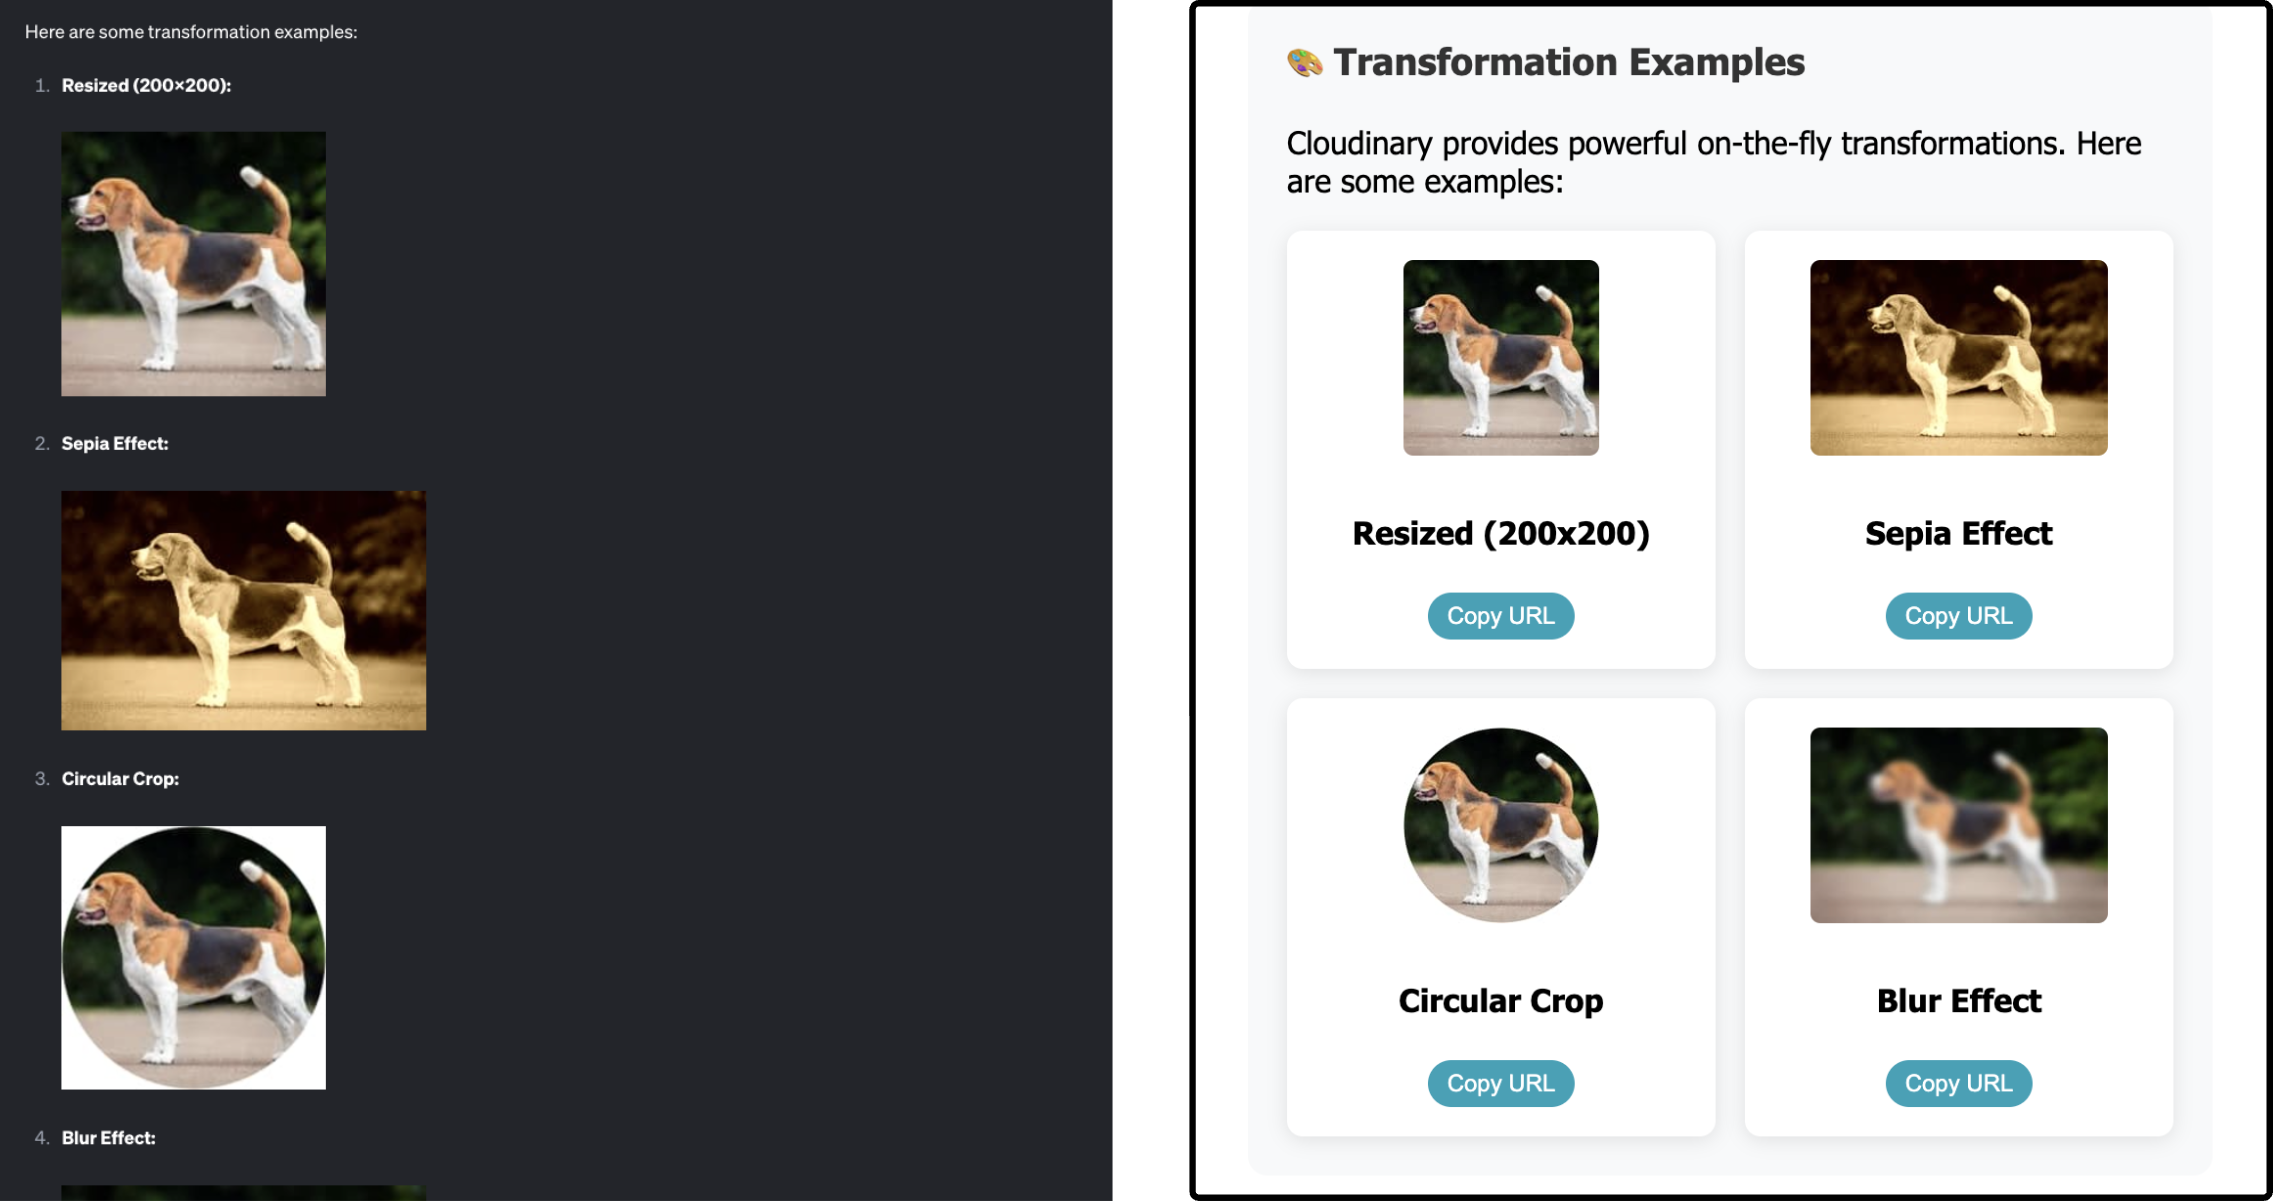
Instead of just telling you, let’s look at the difference.
Before MCP-UI (left): An unstyled block of text with links and raw transformations
After MCP-UI (right): A clean layout with cute interactive cards & previews
Click to see the code
private createUploadResultUI(result: UploadApiResponse): string {
    const isImage = result.resource_type === 'image';
    const isVideo = result.resource_type === 'video';

    return `
    <!DOCTYPE html>
    <html lang="en">
    <head>
    <meta charset="UTF-8">
    <meta name="viewport" content="width=device-width, initial-scale=1.0">
    <title>Cloudinary Upload Result</title>
    <style>
    body {
      font-family: 'Segoe UI', Tahoma, Geneva, Verdana, sans-serif;
      margin: 0;
      padding: 20px;
      background: linear-gradient(135deg, #667eea 0%, #764ba2 100%);
      min-height: 100vh;
    }
    .container {
      max-width: 800px;
      margin: 0 auto;
      background: white;
      border-radius: 15px;
      box-shadow: 0 20px 40px rgba(0,0,0,0.1);
      overflow: hidden;
    }
    .header {
      background: linear-gradient(135deg, #4CAF50, #45a049);
      color: white;
      padding: 30px;
      text-align: center;
    }
    .content { padding: 30px; }
    .preview-section { text-align: center; margin-bottom: 30px; }
    .preview-section img, .preview-section video {
      max-width: 100%; max-height: 300px; border-radius: 10px;
      box-shadow: 0 10px 30px rgba(0,0,0,0.2);
    }
    .actions { display: flex; gap: 15px; justify-content: center; flex-wrap: wrap; }
    .btn { padding: 12px 24px; border-radius: 25px; color: white; border: none; cursor: pointer; }
    .btn-primary { background: #007bff; }
    .btn-success { background: #28a745; }
    </style>
    </head>
    <body>
      <div class="container">
        <div class="header">
          <div style="font-size:3em">✅</div>
          <h1>Upload Successful!</h1>
        </div>
        <div class="content">
          ${isImage ? `<img src="${result.secure_url}" />` : ''}
          ${isVideo ? `<video controls><source src="${result.secure_url}" /></video>` : ''}
          <div class="actions">
            <a href="${result.secure_url}" target="_blank" class="btn btn-primary">🔗 View</a>
            <button class="btn btn-success" onclick="navigator.clipboard.writeText('${result.secure_url}')">📋 Copy URL</button>
          </div>
        </div>
      </div>
      <script>
        const resizeObserver = new ResizeObserver((entries) => {
          entries.forEach((entry) => {
            window.parent.postMessage({
              type: "ui-size-change",
              payload: { height: entry.contentRect.height },
            }, "*");
          });
        });
        resizeObserver.observe(document.documentElement);
      </script>
    </body>
    </html>
    `;
}
Notice the ResizeObserver at the bottom of the HTML.
That little snippet is what keeps the iframe height in sync with your content so if your UI grows or shrinks, the window resizes automatically. Without it, your UI might look cut off and difficult to view.
What Makes MCP-UI Interactive?
A clean UI is nice, but it gets way more interesting when those buttons actually do something. That’s where UI Actions come in; they turn static layouts into interactive tools that can talk back to your agent.
In my Cloudinary server, I added two UI actions right after the ResizeObserver in the <script> block of createUploadResultUI:
- Prompt Action → Fires off a prompt to goose asking it to caption the image like a meme.
Click to see the code
  function makeMeme() {
    window.parent.postMessage({
      type: "prompt",
      payload: {
        prompt: "Create a funny meme caption for this image. Make it humorous and engaging."
      }
    }, "*");
  }
- Link Action → Opens Twitter with the uploaded image pre-linked so you can share it in one click.
Click to see the code
        function shareOnTwitter() {
            const tweetText = encodeURIComponent(
            "I didn’t write this tweet… goose did. (${result.resource_type} included). & here’s how you can do it too 🧵 #MCPUI");
            const imageUrl = encodeURIComponent("${result.secure_url}");
            const twitterUrl = "https://twitter.com/intent/tweet?text=" + tweetText + "&url=" + imageUrl;

            window.parent.postMessage({
            type: "link",
            payload: { url: twitterUrl }
            }, "*");
        }
Want to see it live? Here’s the tweet goose posted for me.
Prompt and Link are just two examples. MCP-UI also supports Tool, Intent, and Notify actions.
Step 4: Look How Small the Diff Is
This is the part that blew my mind, making a tool UI-compatible is just a tiny code change.
Here’s the old version:
return {
    content: [
        {
            type: "text",
            text: JSON.stringify(response, null, 2)
        }
    ]
};
And here’s the new version with MCP-UI support:
return {
    content: [
        {
            type: "text",
            text: `🎉 Upload successful!\n\n${JSON.stringify(response, null, 2)}`
        },
        createUIResource({
            uri: `ui://cloudinary-upload/${result.public_id}`,
            content: { type: 'rawHtml', htmlString: this.createUploadResultUI(result) },
            encoding: 'text'
        })
    ]
};
That’s it. One extra resource, and suddenly goose renders a full UI.
Filesystem: Same Pattern
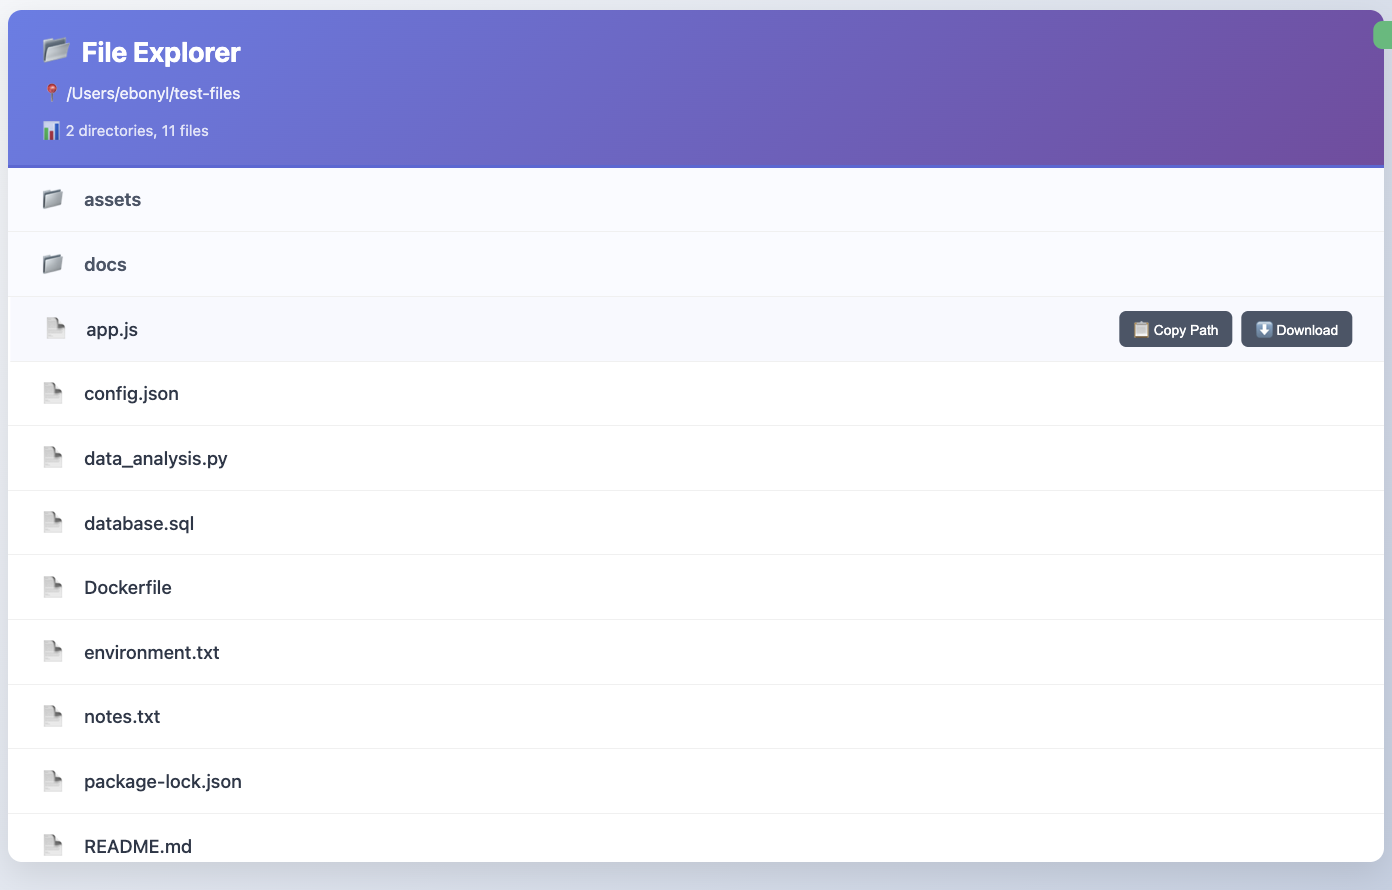
To prove this wasn’t a one-off, I also made the Filesystem MCP server UI-compatible.
Before: Text output (what goose shows by default)

After: UI output (interactive explorer with MCP-UI)
And here’s the only diff you need:
return {
    content: [
        { type: "text", text: `📂 Files in ${directoryPath}:\n\n${textResponse}` },
        createUIResource({
            uri: `ui://filesystem/explorer/${encodeURIComponent(directoryPath)}`,
            content: { type: "rawHtml", htmlString: htmlContent },
            encoding: "text",
        })
    ]
};
Ahead of the Curve
I’ve now made two MCP servers UI-compatible, before MCP-UI is even fully rolled out. That's crazy to me.
And if you zoom out, you’ll see other companies pushing here too. goose and Postman already support rendering and a couple of UI actions. In goose right now, a button can fire off a new prompt or open an external link. It’s not the full vision yet, but it’s already enough to start building experiences that feel more like mini-apps than static responses.
That’s what excites me, we’re not waiting around. We’re experimenting in the open, and shaping what the future will feel like.
Try It Yourself
Wanna see it in action?
Download goose, give an MCP server a UI facelift of your own, and see the magic for yourself. Boring text prompts will never hit the same again.
Got questions? Explore our docs, browse the blog, or join the conversation in our Discord and GitHub Discussions. We’d love to have you.